What Size Patch Is Best for a Hat?
Choosing a patch size for a hat feels simple until you get it wrong. A patch that's too big looks goofy, and one that's too small gets lost.
The best patch size for most hats is between 2 and 3 inches. A 2.5-inch patch is a safe, balanced choice for standard baseball caps, while beanies can handle a larger patch up to 3 inches.
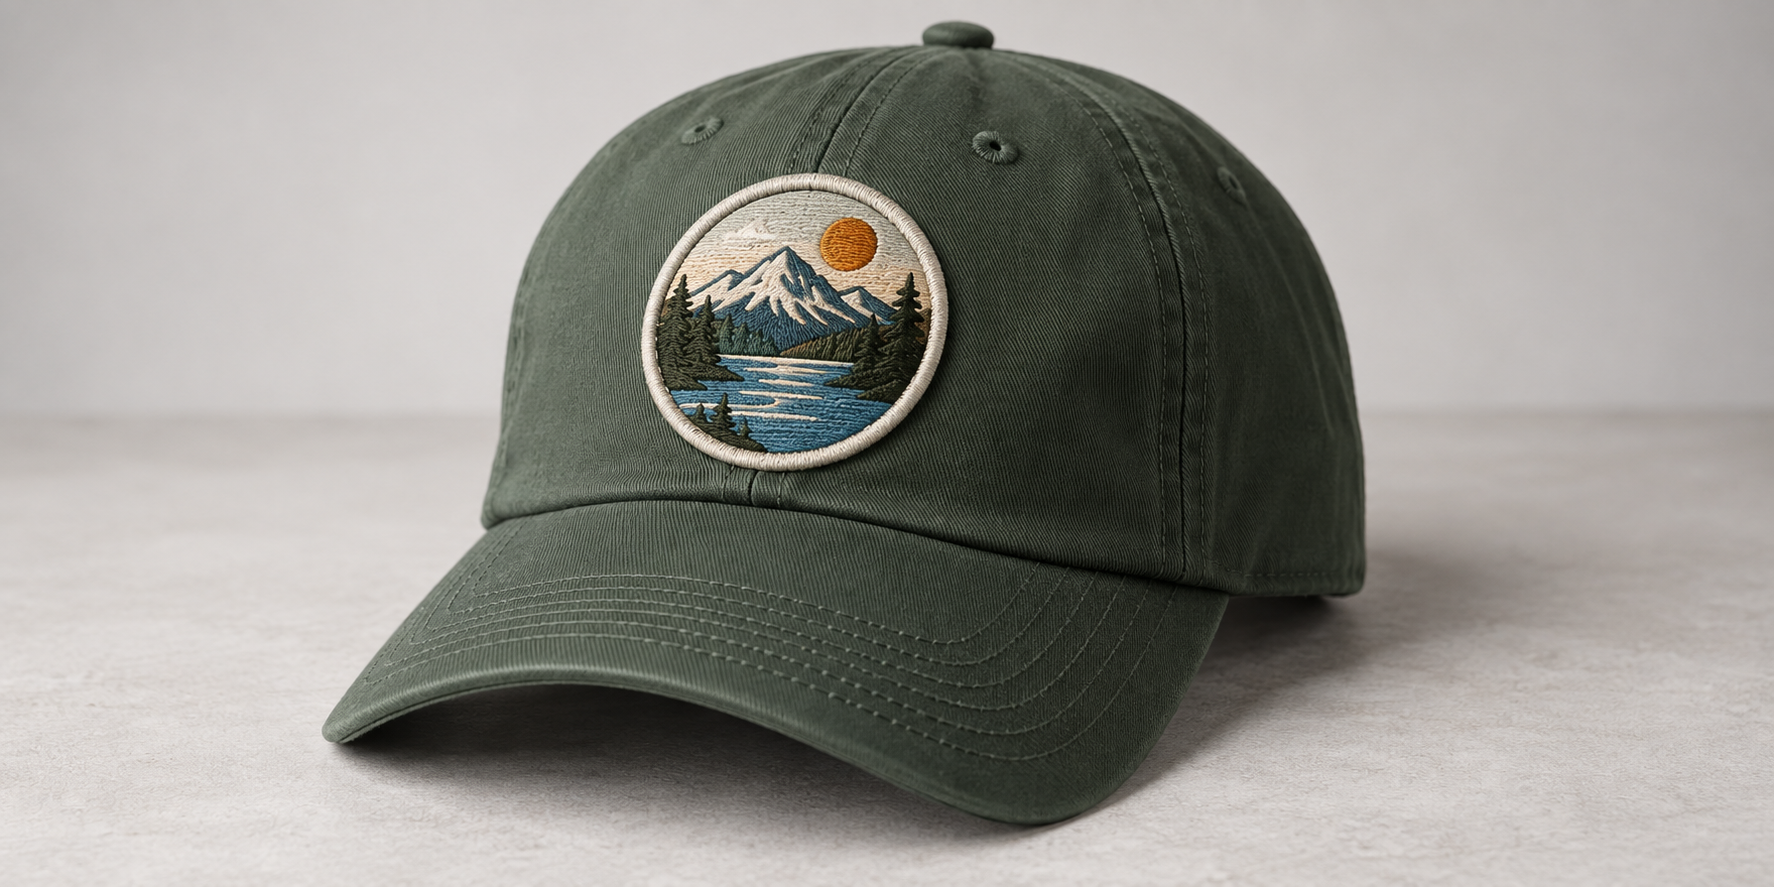
This is a great starting point, but the "best" size really depends on the style of the hat, the shape of your logo, and the overall statement you want to make. As product designers, we know that these small details make or break the final product. A hat isn't just a hat; it's a canvas. The patch is the art. Let's look closer at how to get the proportions just right for a professional look.
How do you measure a patch for a hat?
You have a great patch design, but how do you communicate its "size" to a manufacturer? Listing the wrong dimensions can lead to a sample that doesn't fit the front panel of your hat.
Manufacturers calculate patch size by an average: (Height + Width) / 2. This single number determines the price category. For simple squares or circles, the size is just the width or diameter. For custom shapes, this formula is key.
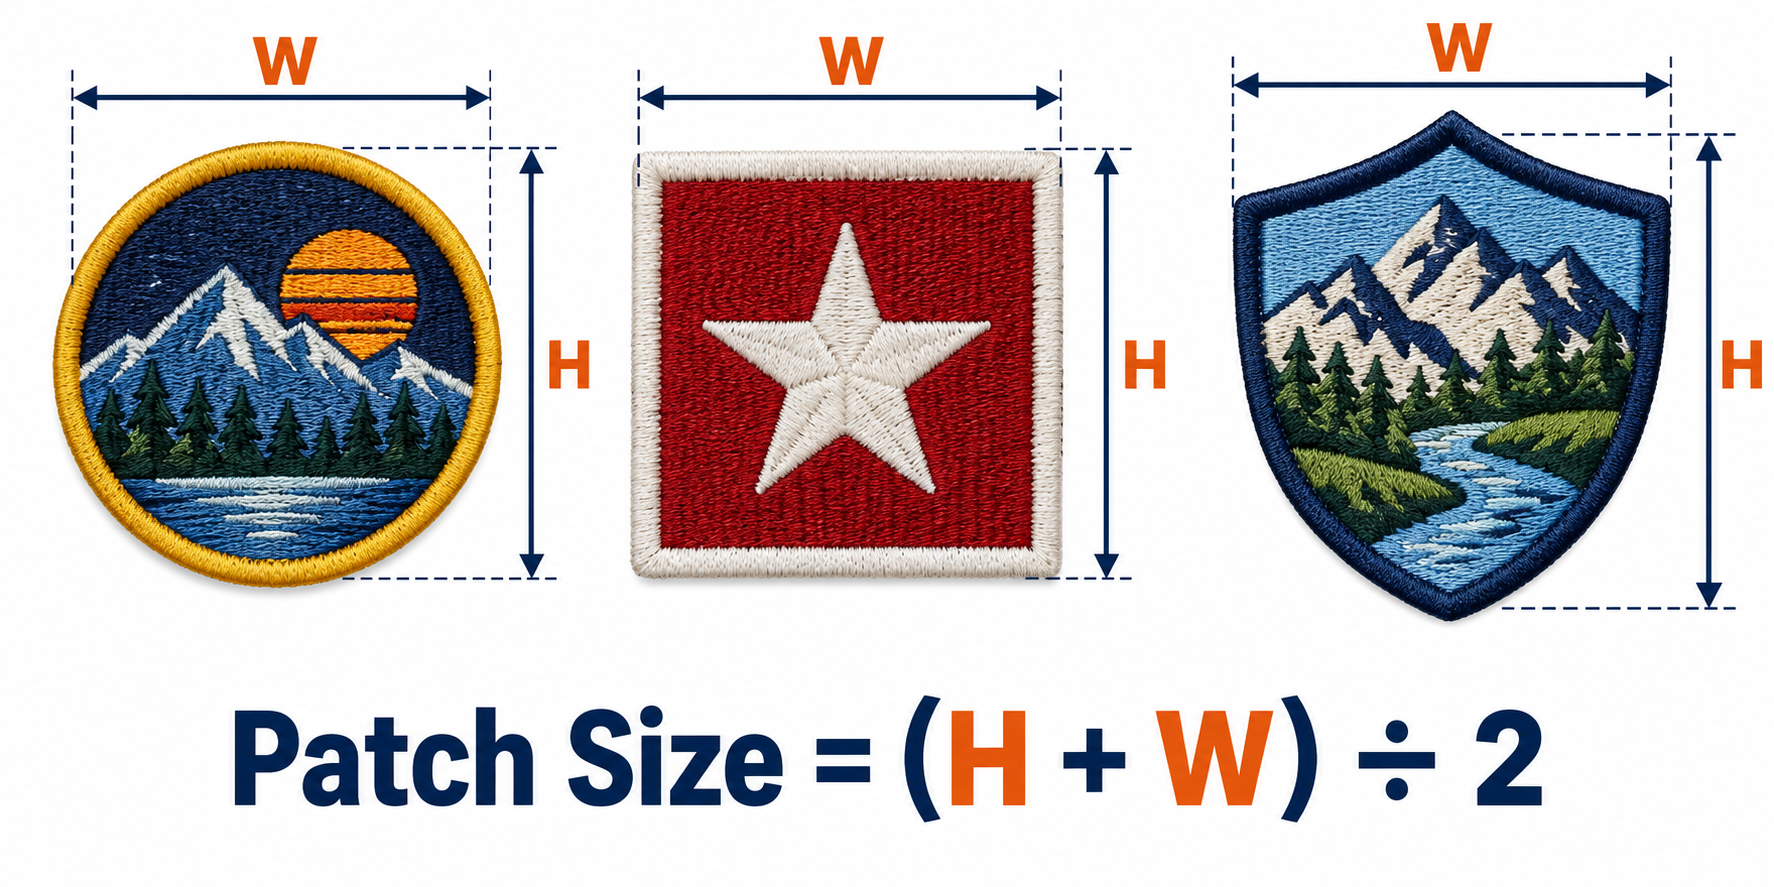
This formula used to trip me up early in my career. I sent a factory a design for a long, thin patch that was 1 inch high and 4 inches wide. I thought of it as a "4-inch patch." The factory, however, calculated it as (1" + 4") / 2 = 2.5 inches. This is their standard method because it normalizes the amount of material and machine time used, simplifying their price quotes. Understanding this is critical for designers like us. It means you can't just think about one dimension; you have to consider the overall surface area and how the factory will quote it.
The Manufacturer's Formula
This industry standard is something you need to have in your design toolkit.
| Patch Shape | Dimensions | Calculation | Quoted "Size" |
|---|---|---|---|
| Circle | 2.5" Diameter | 2.5" | 2.5 Inches |
| Square | 2.5" H x 2.5" W | 2.5" | 2.5 Inches |
| Rectangle | 2" H x 3" W | (2 + 3) / 2 | 2.5 Inches |
| Custom Shape | 2.25" H x 3.25" W | (2.25 + 3.25) / 2 | 2.75 Inches |
Knowing this formula helps you manage your budget and ensures there are no surprises when you get a quote back from your supplier.
What are the standard patch sizes for different hat styles?
You wouldn't put the same size patch on a floppy beanie as on a structured trucker hat. Using a one-size-fits-all approach can make your product line look unprofessional and poorly designed.
For trucker hats and baseball caps, stay between 2" and 2.5" high. For beanies, a 2.5" to 3" patch works well. "Dad hats" with their unstructured front need smaller, more subtle patches, usually around 1.5" to 2" high.

The structure and panel construction of the hat dictates the maximum "real estate" you have for a patch. A stiff, flat-front trucker hat can support a large, bold statement patch. A soft, unstructured "dad hat," on the other hand, would collapse under the weight of a big, heavy patch, ruining the hat's casual aesthetic. When I design accessories, I always start with the base product's limitations and intended use. The same principle applies here. You must design for the specific canvas you're working with.
A Designer's Guide to Hat Patch Sizing
Here is the reference chart I use when spec'ing patches for different types of headwear.
| Hat Style | Max Height | Max Width | My Recommended Size | Design Notes |
|---|---|---|---|---|
| Baseball/Trucker | 2.5" | 4" | 2.25" H x 3.5" W | The center panel is your target. Always leave at least 1/4" of "breathing room" around the patch. |
| Beanie | 3" | 3" | 2.5" Circle/Square | Can be placed on the folded cuff or directly on the beanie above it. The material's stretch allows for larger sizes. |
| Dad Hat | 2" | 3.5" | 1.75" H x 2.5" W | The unstructured front can't support a heavy patch. Smaller, lighter (often woven) patches are best. |
| 5-Panel/Camper | 2" | 4.5" | 1.5" H x 3" W | This hat has a wide, horizontal front panel. It's perfect for wide rectangular or custom-shaped patches. |
Should my hat patch be a custom shape?
A standard square or circle patch is safe, but it can feel a bit boring. You want your brand to stand out, but you're worried about the potential cost and complexity of a custom die-cut shape.
Yes, you should use a custom shape if your logo is strong enough to stand on its own. A die-cut patch that follows the outline of your logo looks more premium and integrated than a logo simply placed on a generic shape.
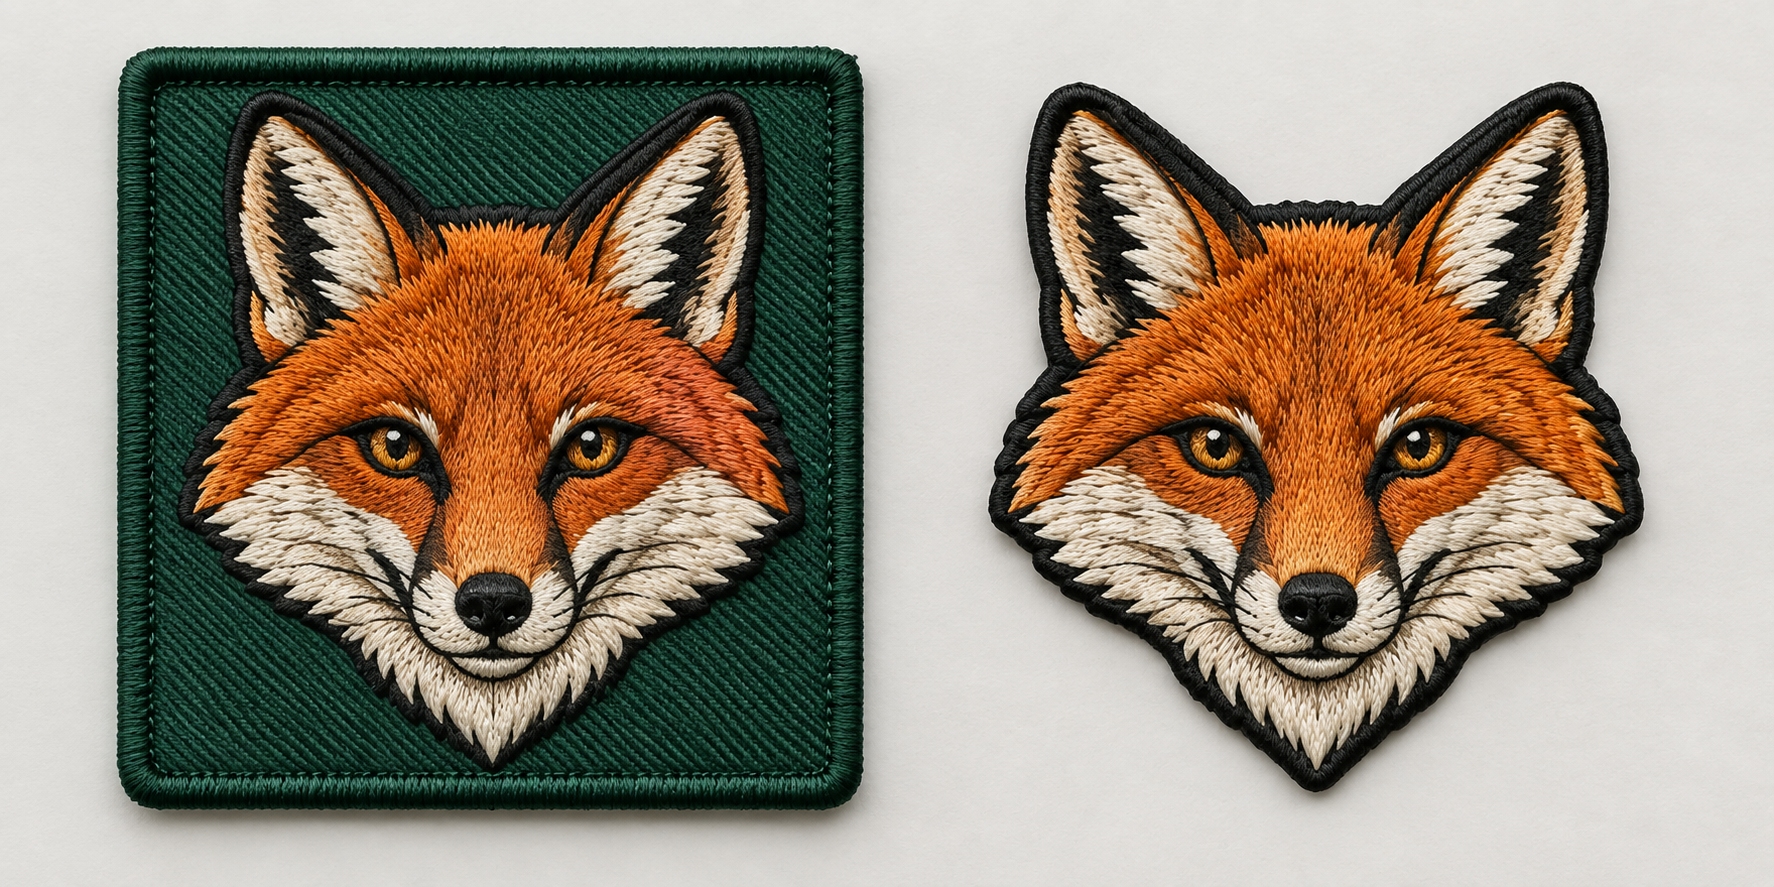
This is a classic form vs. function debate we designers have all the time. My rule is this: if the shape of your logo is your brand identity (think of the Nike swoosh or the Apple logo), then you should absolutely use a custom die-cut patch. It reinforces your brand with confidence. If your logo is complex or text-based, it often looks cleaner and more professional when contained within a simple shape like a circle or rectangle. For embroidered patches, the custom shape is created with a "hot knife" edge that seals the threads. For PVC or woven patches, it's even easier. The small extra cost for a die-cut shape is often negligible on a bulk order and pays for itself in visual impact.
Making the Right Choice
Think about how the patch interacts with the hat.
- Custom Die-Cut: Looks bespoke, intentional, and high-end. It makes the logo feel like it's part of the hat, not just stuck on top of it. Best for bold, simple, iconic shapes.
- Standard Shape (Circle/Square/Rectangle): Creates a clean, contained frame for your logo. It can make a busy logo feel more organized and legible. It's a safe, classic, and professional choice, especially for text-heavy designs.
Ultimately, the patch and the hat should work together as a single, cohesive design.
Conclusion
For most hats, a 2.5-inch patch is a safe bet. But always consider the hat's style and your logo's shape to find the perfect size that makes your design look professional.