Designing a hat but your patch looks off? A bad patch can ruin a great design. I'll guide you through choosing the perfect size, material, and backing for a professional look.
To choose the perfect hat patch, consider proportion, design complexity, and application method. Select a size under 2.5 inches, match the material (embroidered, woven, PVC) to your logo's detail, and choose a backing (sew-on, iron-on, Velcro) that fits your hat's style.
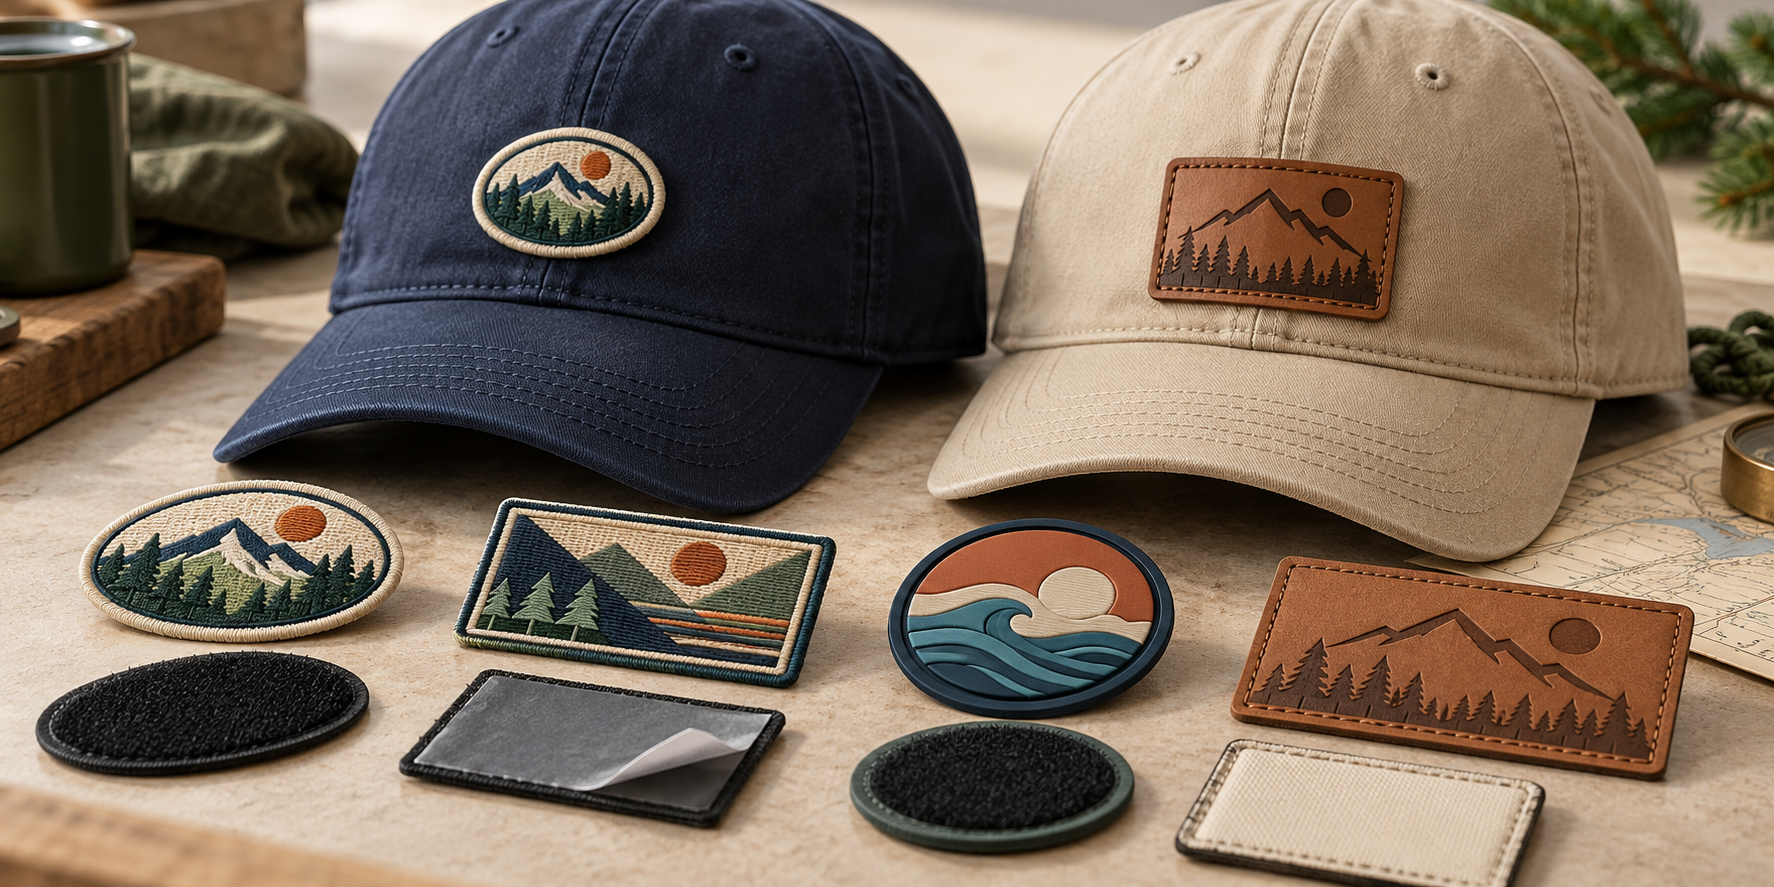
You've got the basics, but the magic is in the details. As a designer who has sourced thousands of patches for different brands, I know that getting these three elements—size, material, and backing—right is what separates amateur merch from professional apparel. Let's start with the most common question I get: size.
What's the Best Size for a Hat Patch?
Afraid your patch will overwhelm your hat or be too small to see? Getting the scale wrong looks unprofessional. I'll show you the industry standards for perfect patch sizing.
The best size for a front-facing hat patch is typically between 2 to 2.5 inches tall and up to 3.5 inches wide. This ensures the patch is prominent without overpowering the hat's structure. For side patches, aim for a smaller size, around 1 inch.
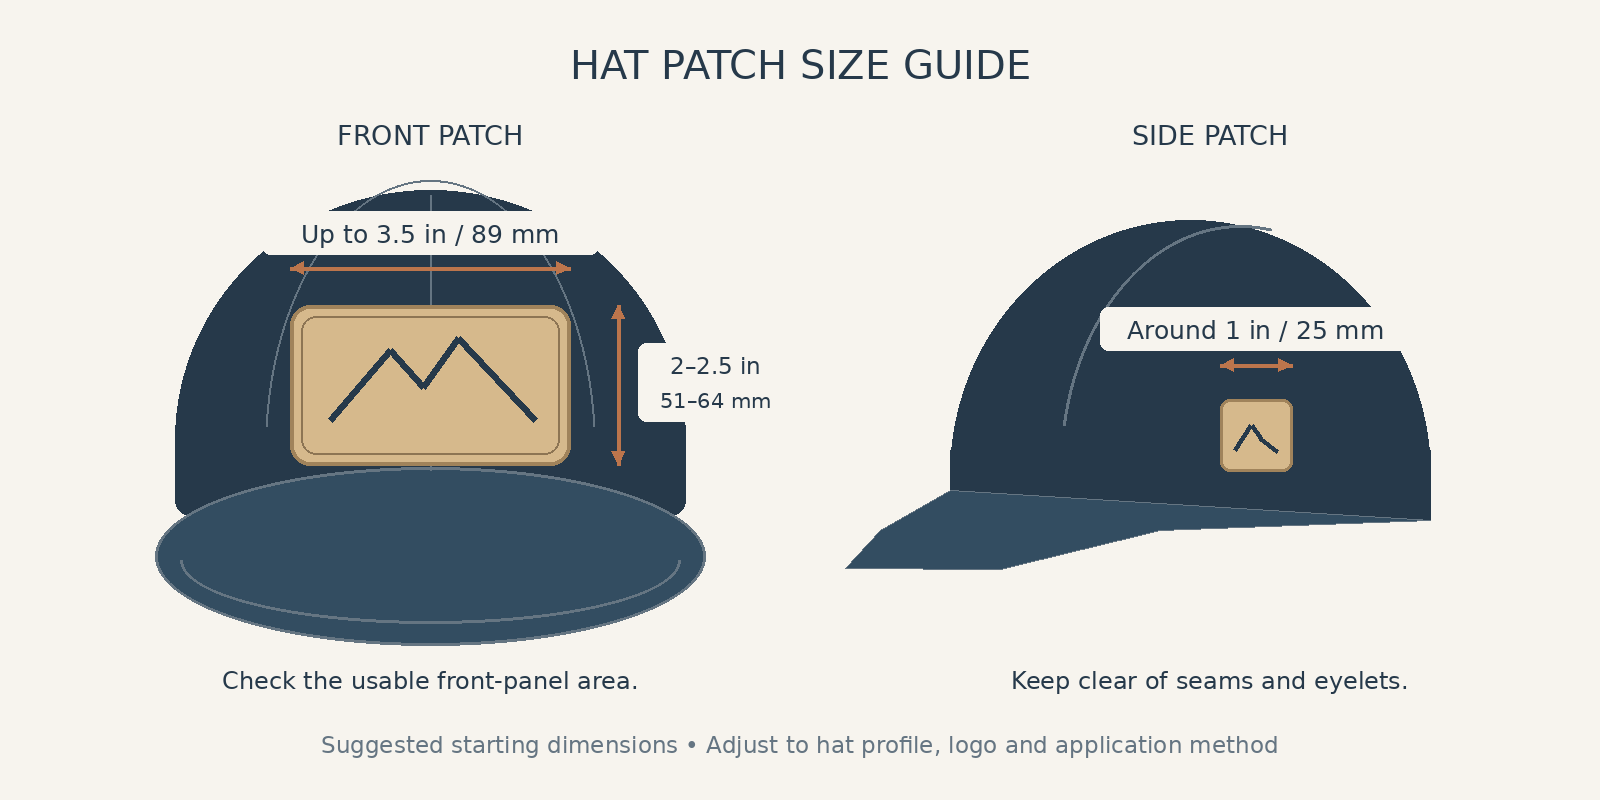
Patch sizing is all about proportion. The goal is for the patch to complement the hat, not dominate it. The most common mistake I see is making the patch too big. For a standard baseball cap or trucker hat, the available "real estate" on the front is about 2.5 inches high. Pushing your patch right to this limit can look clumsy. I always advise my clients to aim for a height of 2.25 inches. This leaves a nice, clean border around the patch, making it look intentional and well-designed. The width can vary more depending on your design, but try to stay under 4 inches to avoid distorting the hat's crown. Always consider the hat's structure. A soft, unstructured "dad hat" can't support a large, heavy patch as well as a structured trucker hat can.
| Patch Location | Recommended Height | Recommended Width | Primary Consideration |
|---|---|---|---|
| Front Center | 2" - 2.5" | 2" - 3.5" | Balance and overall hat shape. |
| Side Panel | 0.75" - 1.25" | 1" - 2" | Subtlety and avoiding ear irritation. |
| Back (Strap) | 0.5" - 1" | 1" - 2.5" | Sized to fit on or above the strap. |
Embroidered, Woven, or PVC: Which Patch Material is Right for My Design?
Is your intricate logo turning into a blob on your patch? The wrong material can't capture the detail you worked so hard to design. Let's match the material to your artwork.
Choose embroidered patches for a classic, textured look with simple logos. Use woven patches for designs with fine lines and small text. Opt for PVC patches for a modern, durable, and waterproof style with sharp, vibrant colors and 3D effects.
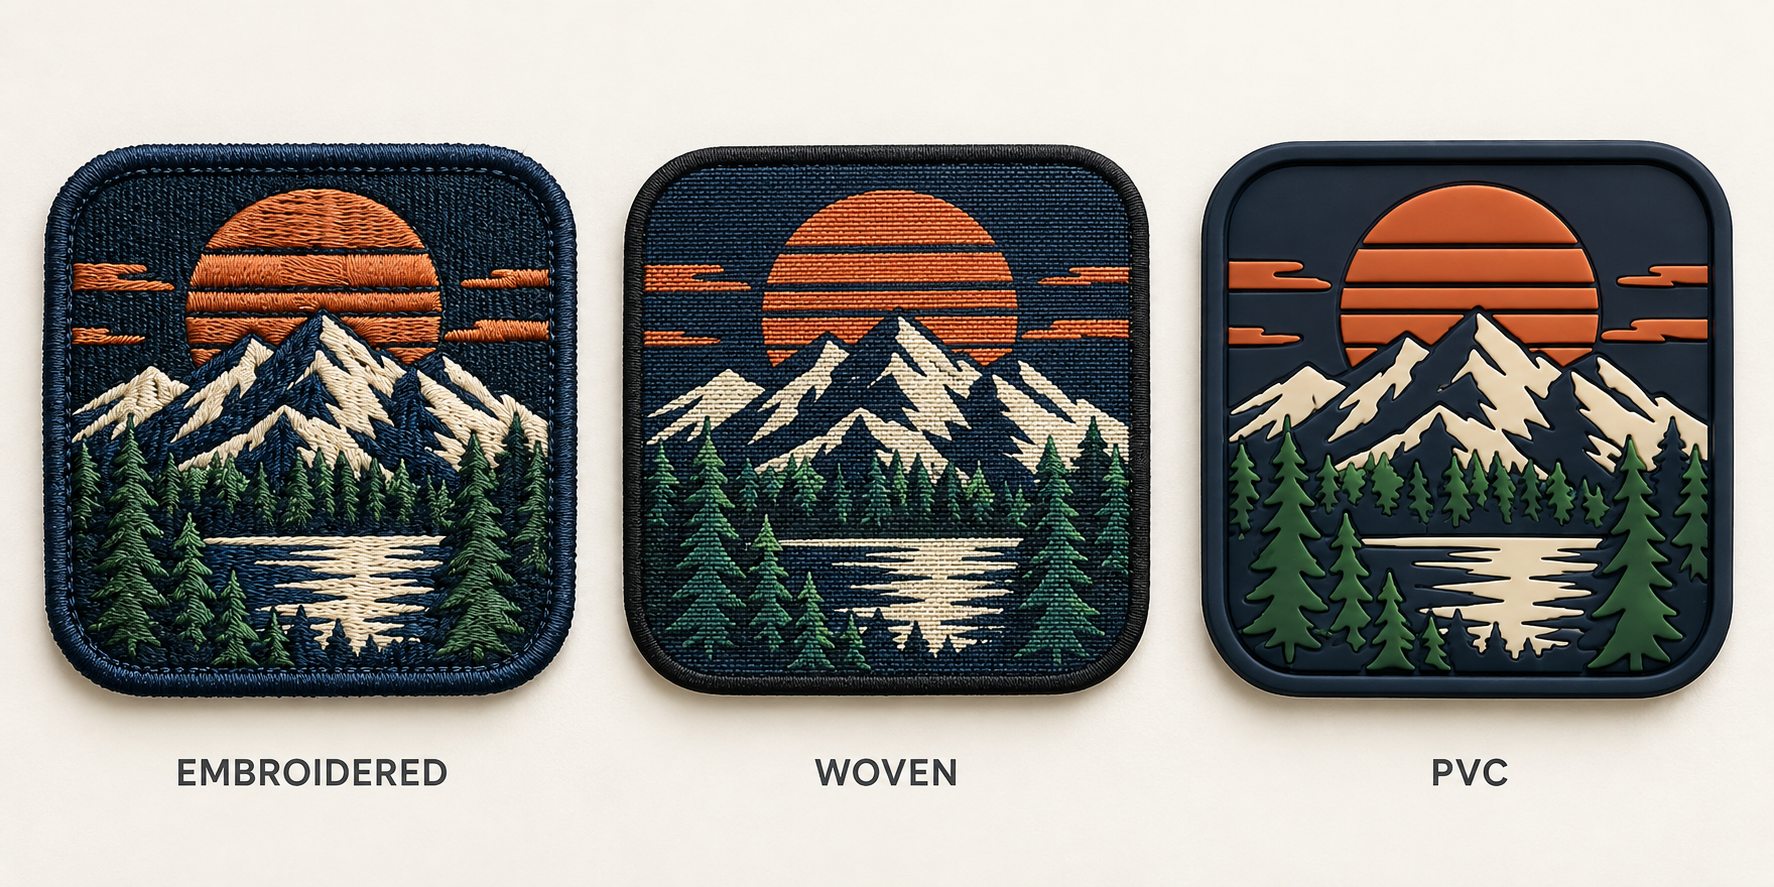
The material you choose directly impacts how your final design will look. It's not just about feel; it's about detail resolution. An embroidered patch is the traditional choice, made by stitching thread onto a substrate. It has a classic, raised texture but struggles with very fine details or small letters. It's perfect for bold, simple graphics. A woven patch, on the other hand, is made by weaving threads together to create the patch itself, much like a label. This allows for photorealistic detail and tiny, crisp text. I used woven patches for a client with a complex crest logo that was impossible to embroider cleanly. PVC patches are a different beast entirely. They are made from soft rubber, allowing for sharp lines, vibrant colors, and even 3D layered effects. They are extremely durable and waterproof, making them ideal for outdoor or tactical brands.
| Material | Best for | Detail Level | Feel/Look |
|---|---|---|---|
| Embroidered | Bold graphics, simple logos | Low-Medium | Classic, textured, thick |
| Woven | Fine text, intricate details | High | Smooth, flat, sharp |
| PVC (Rubber) | Modern designs, 3D effects | Very High | Modern, durable, waterproof |
Iron-On, Sew-On, or Velcro: Which Backing Should I Choose?
Worried your patch will fall off or look poorly attached? The backing method is just as important as the patch itself for durability and a professional finish.
Choose a sew-on backing for the most secure and professional application. Use iron-on for easy DIY application on suitable fabrics. Select Velcro for modularity, allowing the patch to be easily swapped, which is ideal for uniforms and merchandise collections.
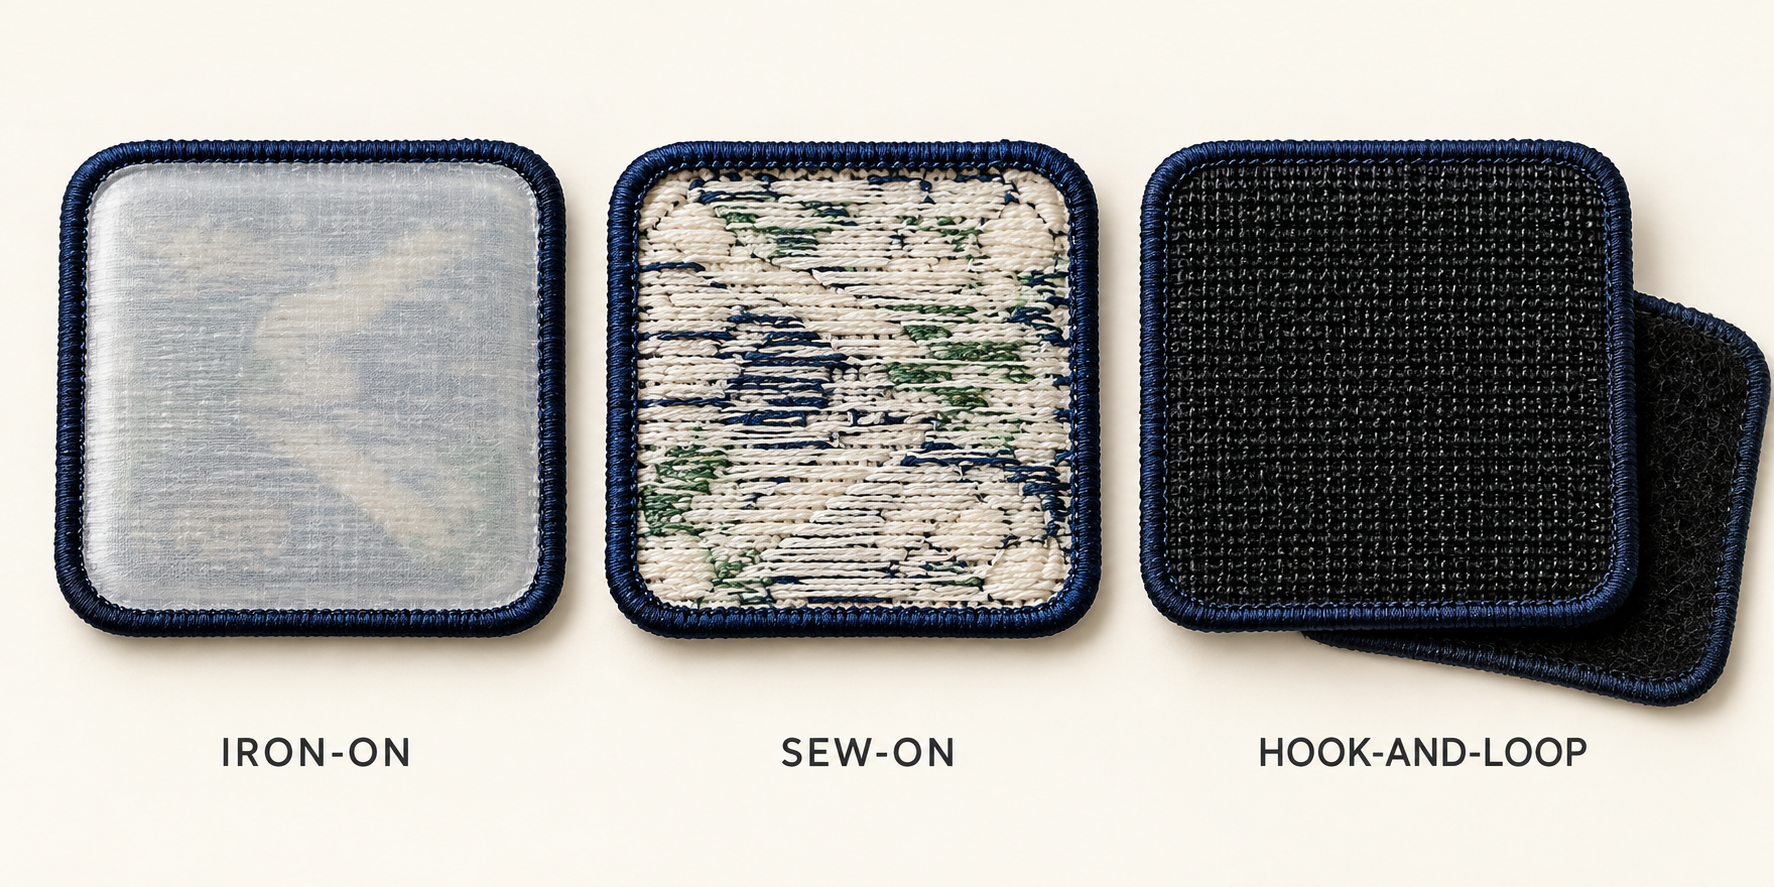
The backing determines how your patch is attached, and it’s a critical choice. A sew-on patch offers the most durable and permanent bond. It’s the industry standard for high-quality headwear because it will never peel off. This is my default recommendation for any premium product. An iron-on backing has a heat-activated adhesive. It’s great for quick, easy application, but it’s not foolproof. The adhesive can fail over time, especially with washing, and it doesn't work well on all materials like nylon or certain polyesters. I generally advise against it for products you intend to sell, as it can lead to quality issues down the line. Velcro (or hook-and-loop) is a fantastic functional choice. It consists of a hook backing on your patch and a loop field on the hat. This is perfect for brands that want to sell multiple patches that customers can swap out, creating an interactive and customizable product.
Conclusion
Choosing the right patch comes down to three key decisions: ensuring the size is proportional, matching the material to your design's detail, and selecting a backing that guarantees a durable, professional application.