What Artwork File Is Needed for Custom Patches?
You’ve finalized a great design for your new custom patch, but sending the wrong file to your manufacturer can cause frustrating delays, unexpected fees, and a final product that looks nothing like you envisioned.
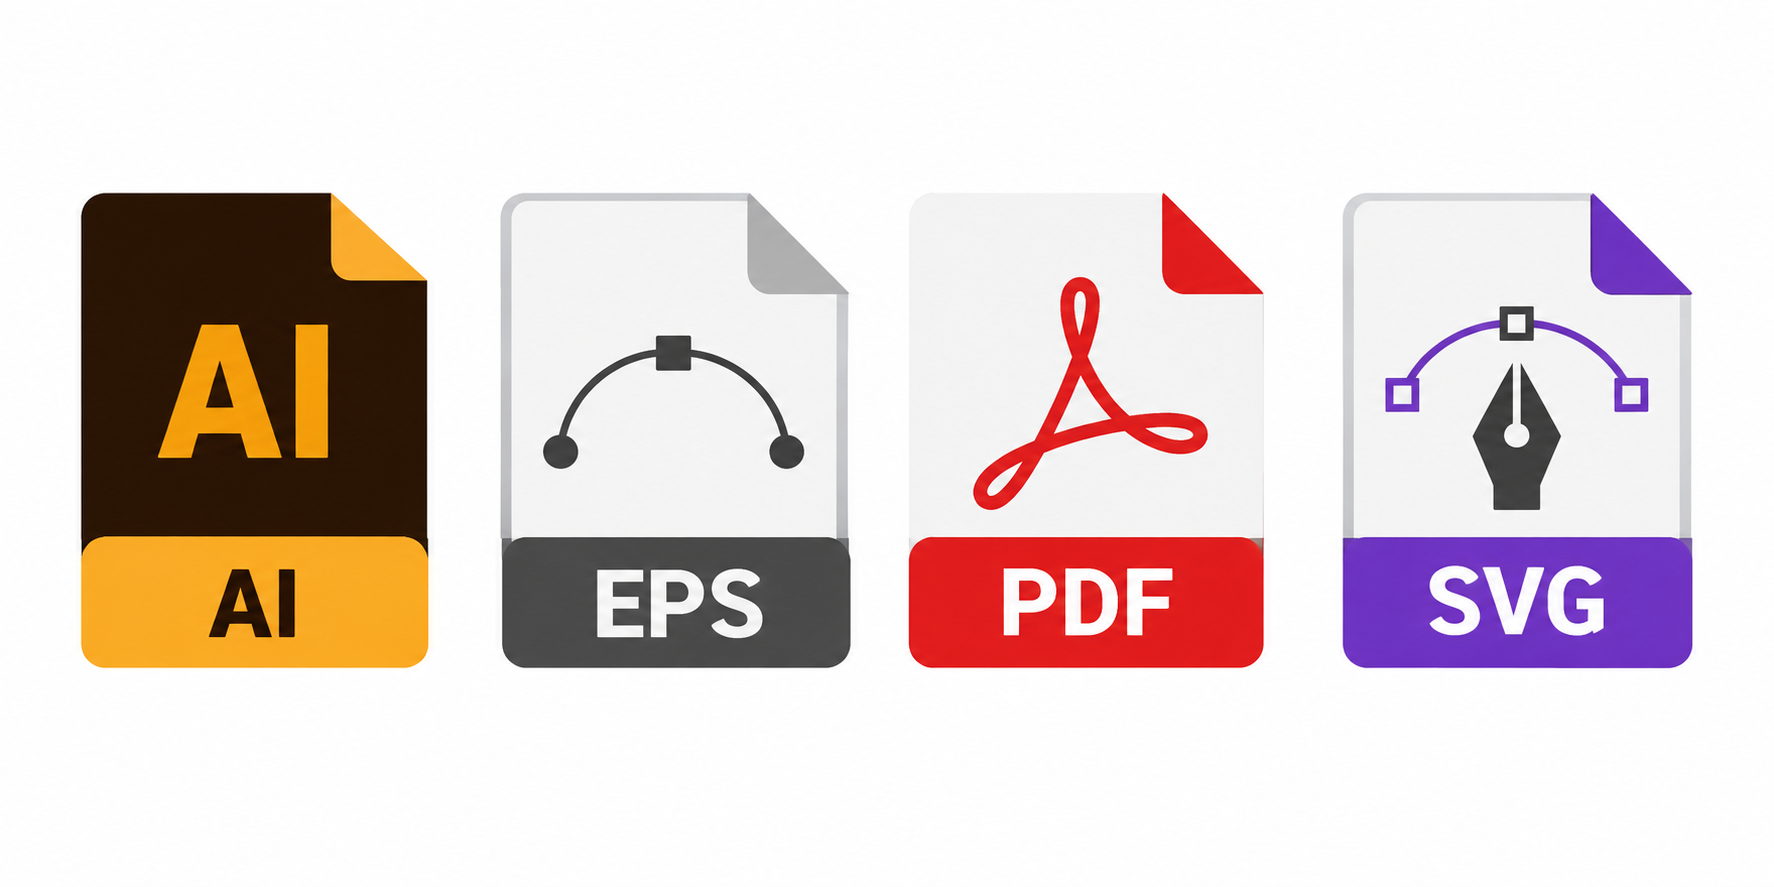
The best artwork file for custom patches is a vector file. Common vector formats include Adobe Illustrator (.AI), .EPS, .SVG, or a vector-based .PDF. This type of file ensures your design can be perfectly scaled and edited by the factory without any loss of quality.
As someone who bridges the gap between design and manufacturing every day, I can tell you that artwork issues are the number one cause of production delays. A good file makes the process smooth, fast, and accurate. A bad file creates ambiguity, which leads to errors. Understanding why your manufacturer is asking for a specific file type is the first step to getting a perfect patch on the first try.
Why is a Vector File (.AI, .EPS, .PDF) the Gold Standard?
You sent a perfectly good-looking image file, but the factory replied asking for a "vector" version. This technical jargon can be confusing and holds up your project.
Vector files are the gold standard because they are built with mathematical equations, not pixels. This allows them to be scaled to any size—from a business card to a billboard—without becoming blurry or losing any detail, ensuring a crisp final patch.
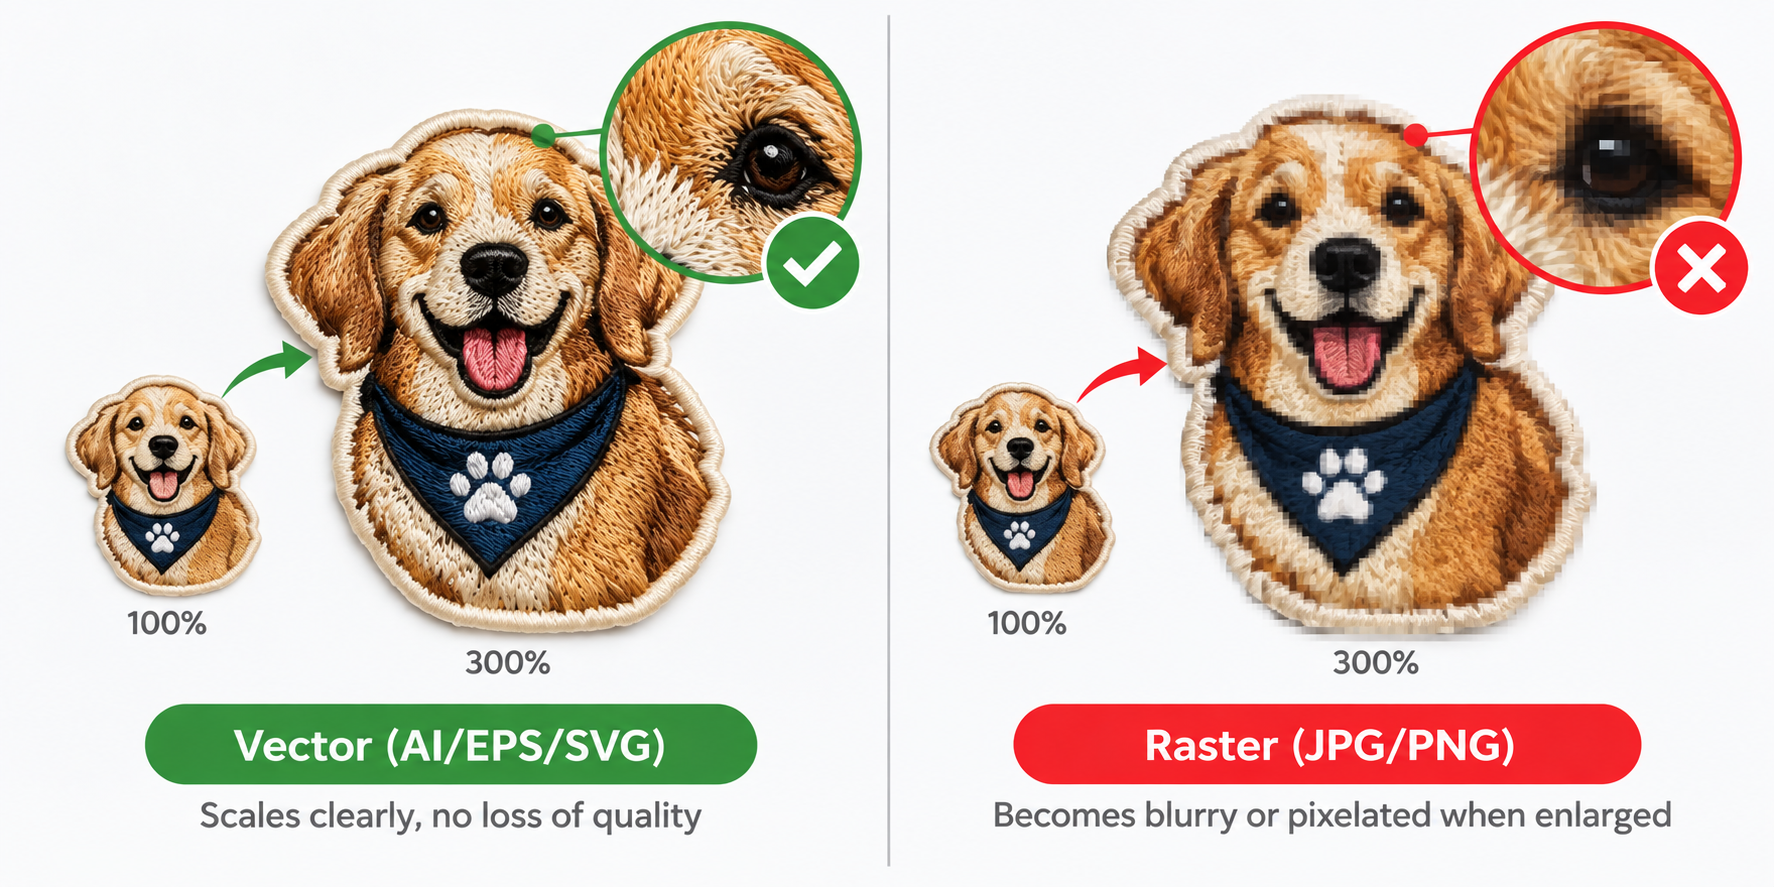
Think of a vector file as a recipe. The recipe tells the computer how to draw the lines, curves, and colors to create your design. You can use that same recipe to bake a tiny cupcake or a giant wedding cake, and it will be perfect every time. A raster file (like a JPG) is like a photograph of the cake. If you try to blow up that photo, it gets blurry and pixelated. When I send an .AI file to my factory, they have the "recipe." They can isolate colors for embroidery, create clean cut lines, and prepare the design for their machines with 100% accuracy. It removes all guesswork.
Vector vs. Raster: The Key Differences
| Feature | Vector File (.AI, .EPS, .SVG) | Raster File (.JPG, .PNG) |
|---|---|---|
| Composition | Points, lines, and curves (mathematical) | Pixels (a grid of tiny squares) |
| Scalability | Infinitely scalable without quality loss | Loses quality and becomes pixelated when enlarged |
| Best For | Logos, illustrations, and patch production | Photographs and complex digital paintings |
| Editability | Easy to edit shapes, lines, and colors | Difficult to edit individual elements |
What If I Only Have a Raster File (.JPG, .PNG)?
That sinking feeling when the factory asks for a vector file, but all you have is a .JPG your friend designed years ago. Are you stuck without a way to produce your patch?
If you only have a raster file like a .JPG or .PNG, send the highest resolution version you can find. Your patch supplier will then need to manually recreate, or "vectorize," your design. This is a common service that may add a small fee and a day to the timeline.
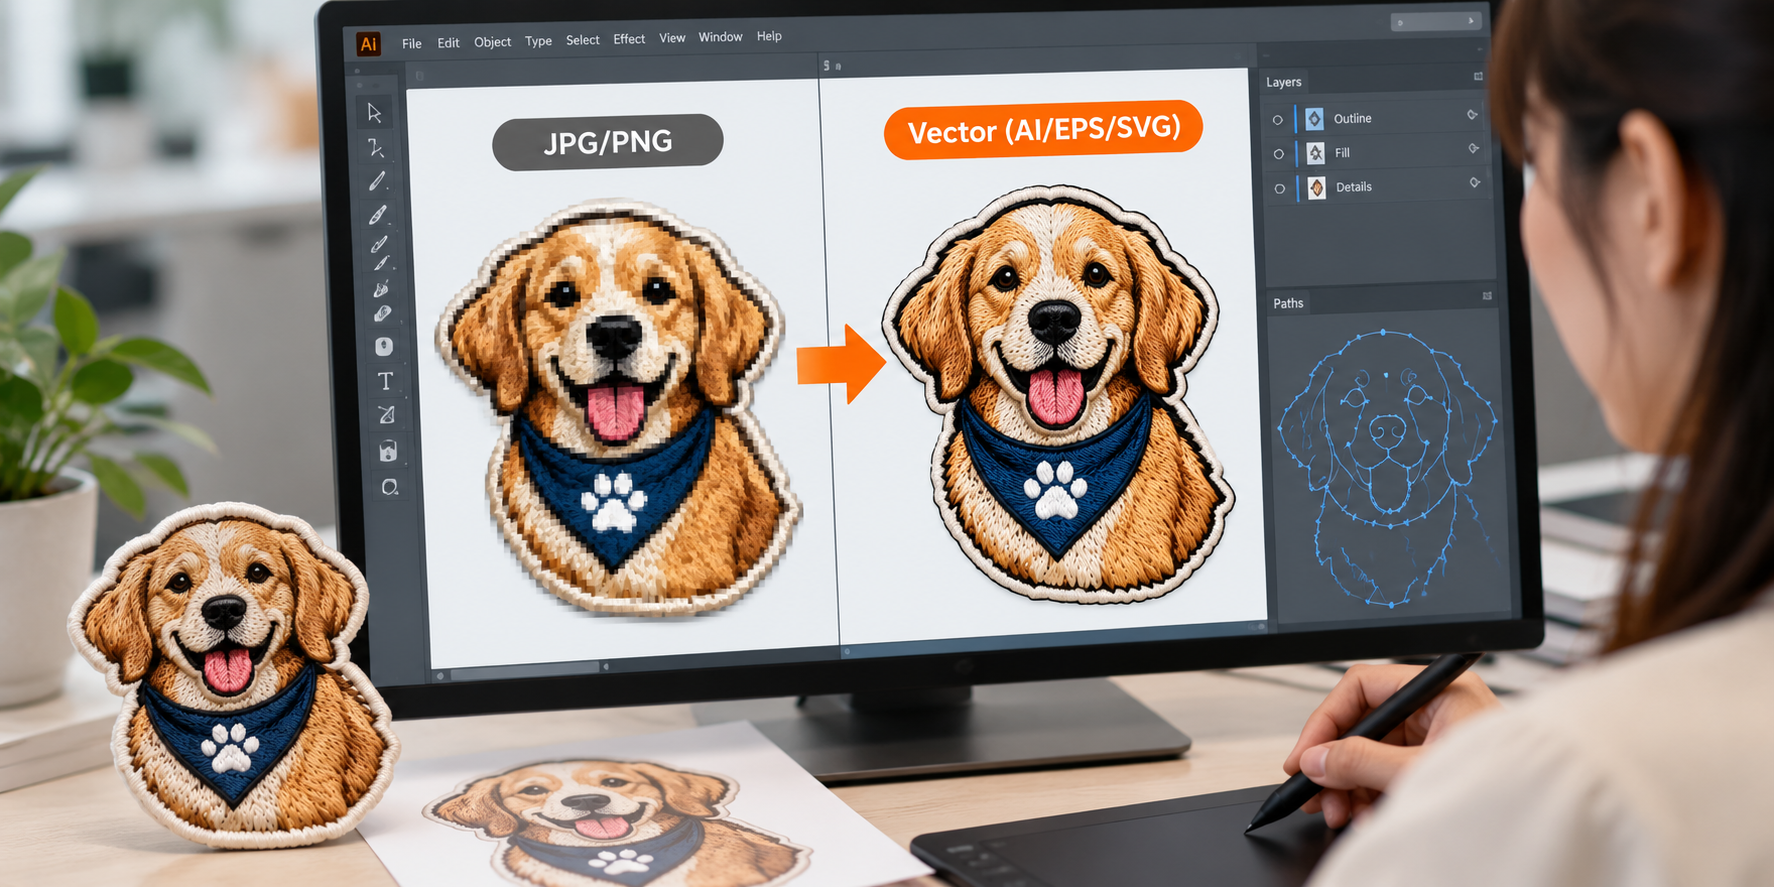
Don't panic! This happens all the time. In my consultancy, we help clients with this every week. The key is providing the best possible source file. A tiny, blurry screenshot from a website is the worst-case scenario. The original, large .JPG or .PNG file from the designer is best. My team then takes that raster image and essentially traces it by hand in a program like Adobe Illustrator to create a brand new, clean vector file. We call this "vectorization" or "redrawing." While some software can do this automatically, a manual redraw by a skilled designer ensures every line and curve is perfect and true to the original intent.
What to Do When You Don't Have a Vector File
- Find the Best Quality: Search your files for the largest version of the image. Look for files with high resolution (ideally 300 DPI) or large pixel dimensions.
- Be Aware of a Redraw Fee: Most suppliers charge a small one-time fee for this service, typically between $15-$50, depending on the complexity. Think of it as a necessary setup cost.
- Approve the Proof Carefully: Since a designer is recreating your art, they are making small interpretations. Carefully review the digital proof they send back to ensure it perfectly matches your original design before you approve it for sampling.
How Does Artwork Affect the Final Patch Quality?
You approved the digital proof, but the final physical patch has text that's hard to read or details that look soft and undefined. How did this happen?
The quality of your artwork file directly dictates the physical quality of the final patch. A clean vector file allows machines to create sharp lines for PVC molds or precise stitch paths for embroidery, resulting in a crisp, professional product.
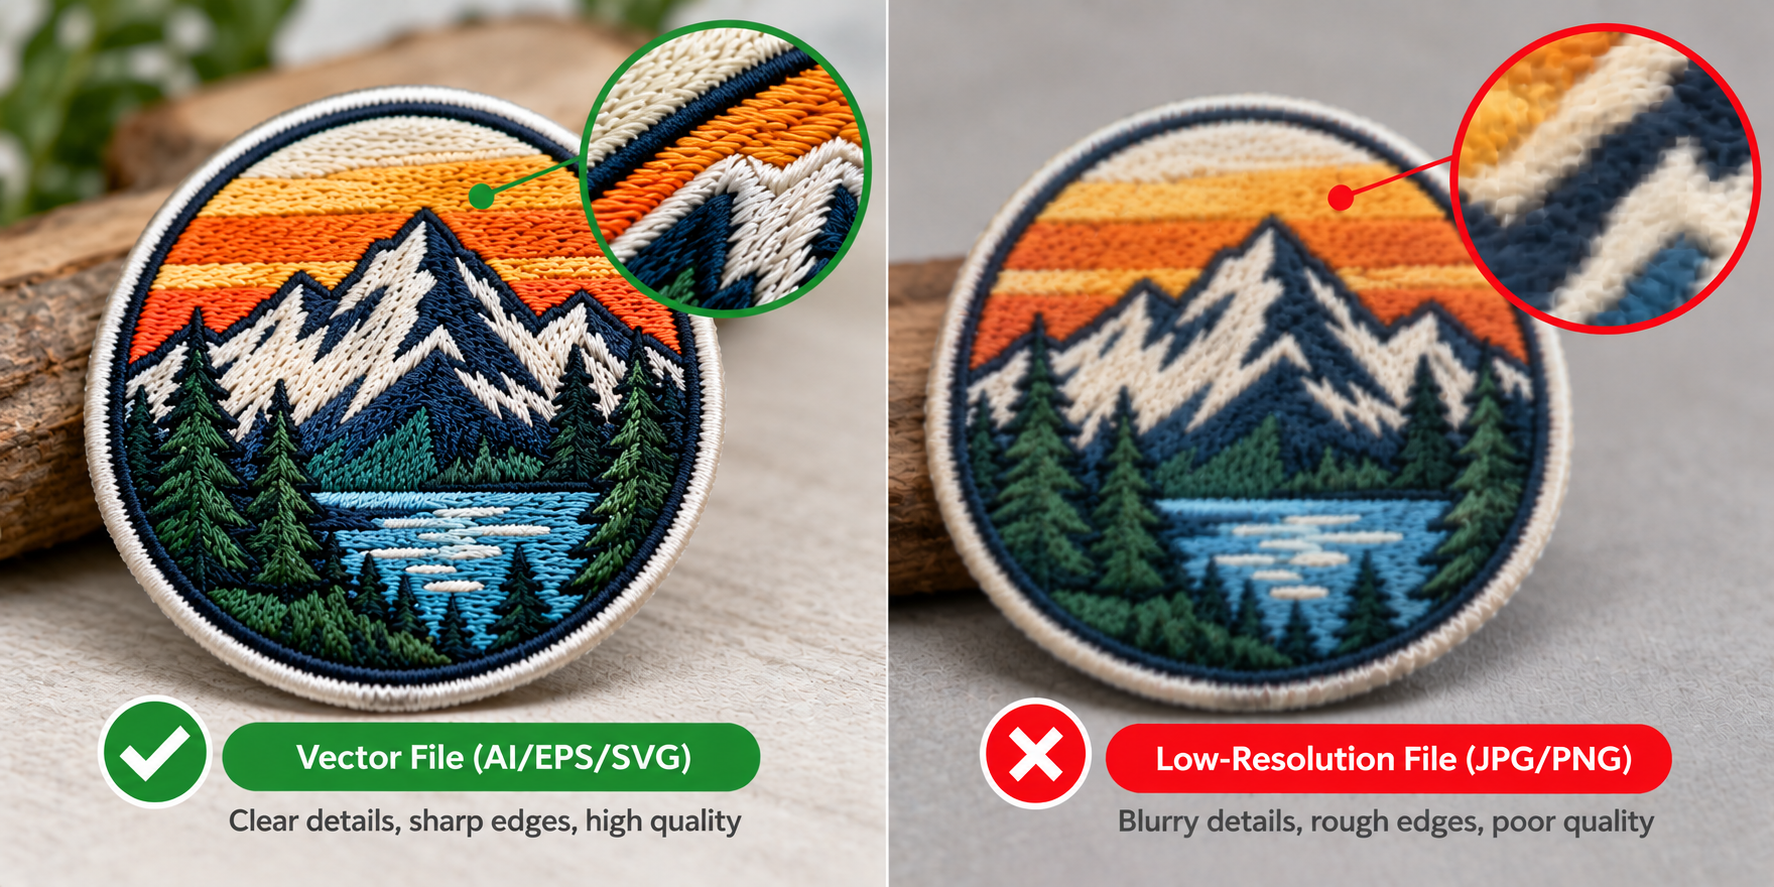
The file isn't just a picture; it's a blueprint. For an embroidered patch, a clean vector file lets the digitizer create a precise stitch plan, telling the machine exactly where to put every single stitch to create sharp text and logos. If you start with a blurry .JPG, the digitizer has to guess where the lines are supposed to be, which results in soft edges and "lumpy" text. For PVC patches, it's even more critical. The vector file is used to mill a physical metal mold. Any imperfection in the file—a jagged line, a weird curve—is permanently cut into the steel mold. A bad file literally creates a bad mold, which will produce bad patches forever. Starting with a great file is the cheapest and easiest way to ensure a great result.
From File to Fabric: The Translation
- Embroidery: A clean line in your vector file becomes a clean, tight satin stitch on the patch. A blurry line becomes a messy, undefined fill stitch.
- PVC: A perfect circle in your vector file becomes a perfectly machined mold cavity, resulting in a sharp, raised circle on your patch. An imperfect circle from a bad trace results in a wobbly, unprofessional-looking final product.
- Woven: Fine text from a vector file can be woven with incredible precision. The same text from a low-res file would be completely unreadable.
Conclusion
For the best results, always provide your patch manufacturer with a vector file (.AI, .EPS, .SVG). This ensures a smooth process and a high-quality final product that you'll be proud of.Drafting Patch Artwork Guide
I'm currently outlining a blog post focused on the required artwork file types for custom patch production. My goal is to provide a clear, expert guide for designers and brands, drawing from my experience in manufacturing to demystify the process.
Outlining Artwork Requirements
I'm currently structuring my blog post about custom patch artwork. My focus is on clearly outlining why vector files are superior for production and how they directly impact the final product's quality, drawing from my extensive manufacturing experience.
Structuring Blog Post Content
I am now focusing on structuring the blog post content. My aim is to organize the information into clear, problem-solving sections that address common questions about artwork files for custom patches, ensuring a logical flow for the reader.
Refining Blog Post Structure
I am now organizing the blog post into distinct sections, each designed to address a specific user question about patch artwork. The goal is to create a logical, easy-to-follow guide that provides clear answers and expert advice.
Detailing File Type Impact
I'm currently focused on the final section of my blog post, explaining how artwork file quality directly impacts the final physical patch. My goal is to connect the technical file requirements to tangible outcomes in embroidery and PVC production.